Hi Minions:
Today I am writing this article while I drink a good coffee. Homemade. A coffee made by oneself, to your taste, in your house. I love coffee. And it has its secret to prepare it properly, even more, if you use an Italian coffee maker. It is necessary to know what type of coffee to use, (I always use natural coffee), how much coffee to use, what pressure to put it in the filter, how much water to use and what type of water, … Many factors must be taken into account when preparing good coffee. So that it has a good aroma and flavor, and a good amount of caffeine.
Whenever I talk about secrets, I do not know why reason, I always come to mind the steganography, which consists basically of hiding messages within other objects. And, I do not know why, every time I think about steganography, the same tool that I usually remember when I speak of forensic analysis on photographs comes to my head. (The photography is another of my passions, although I have lately left it a little abandoned). Exiftool, developed by Phil Harvey, which is a free and open source software program for reading, writing and manipulating metadata of many file formats. Exiftool works both for Linux and Windows and Mac OS.
According to the ForensicsWiki site,
ExifTool can be useful in forensic analysis, but it is not a forensic tool, nor is it an anti-forensic tool.
Personally, I think it is both.
I want to show you several examples, using only some of its own manual, so that you can see the power of this tool that, really, would give to write a book.
As always, we proceed to its installation, through
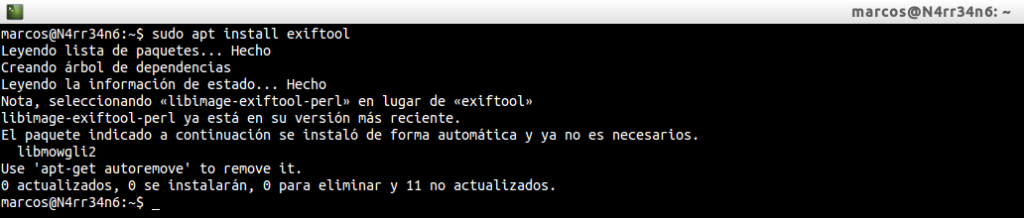
We invoke the tool, to see what help parameters can offer us.

Directly it tells us that we should consult its documentation for see a complete list of options. Well, we can do this:

And we start reading …
The first thing we see is that it says it can read and write metadata in files. Then we can see a synopsis of how it is used.

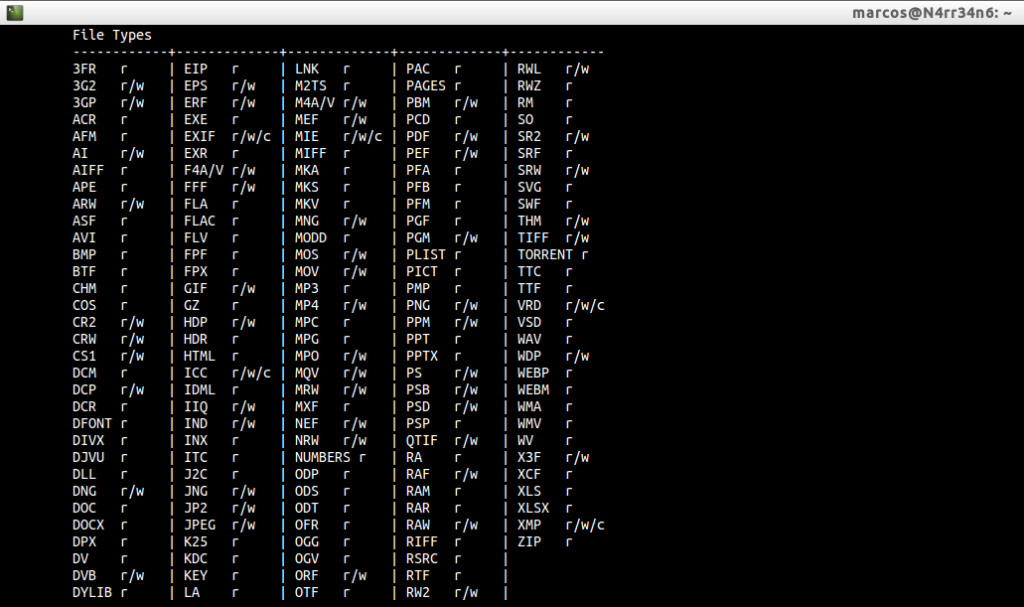
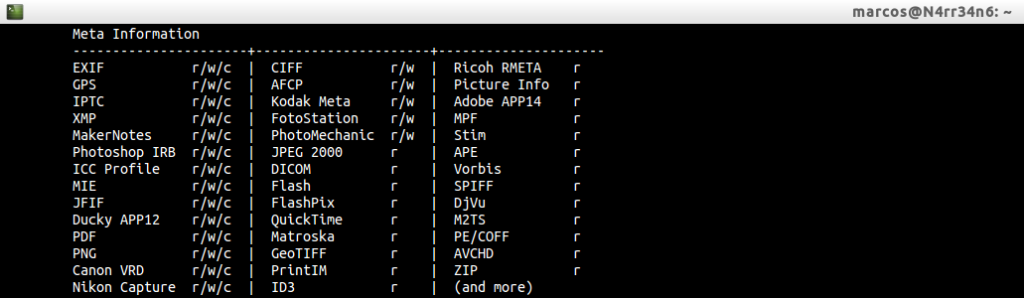
I mentioned at the beginning that it can work with many file formats. We can see all the formats that it supports if we continue reading its manual, with the actions that can carry out for each one of them:
R: Read
W: Write
C: Create
And we can also see with what types of metadata works, with the actions you can take on each of them:
R: Read
W: Write
C: Create
There is a lot of information in your manual. I can only recommend reading it.
Let’s see how it works, first, with one of my last photographs, made with my old Canon EOS 20D.
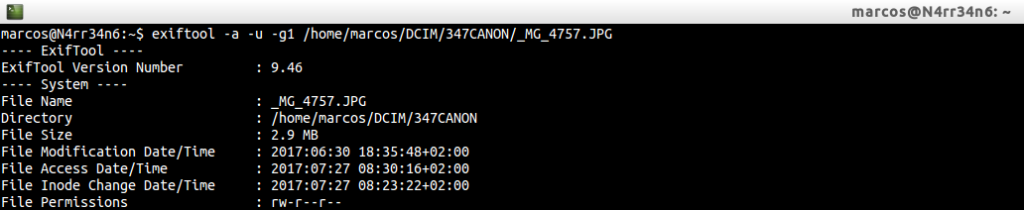
With just this form of execution, we get a lot of information that can be, as the case may be, of relevant importance.
The first thing we see is the file name, the directory and the size. Then we can see a timestamp information. In this case, the access dates are affected because I copied the images from my CF card to the lab. However, the modification date has not been altered since its creation, as we shall see below. We can also see the type of permissions that are available in the image, as well as its type of format.
These data, personally, I consider important because if it is a forensic analysis timestamps must be respected . We have to make sure we do not change anything.

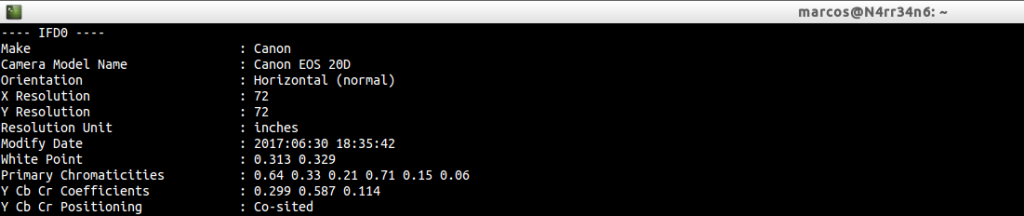
We continue reading, and we find the brand and model of the camera with which the photograph was made. We also have his available orienteering.

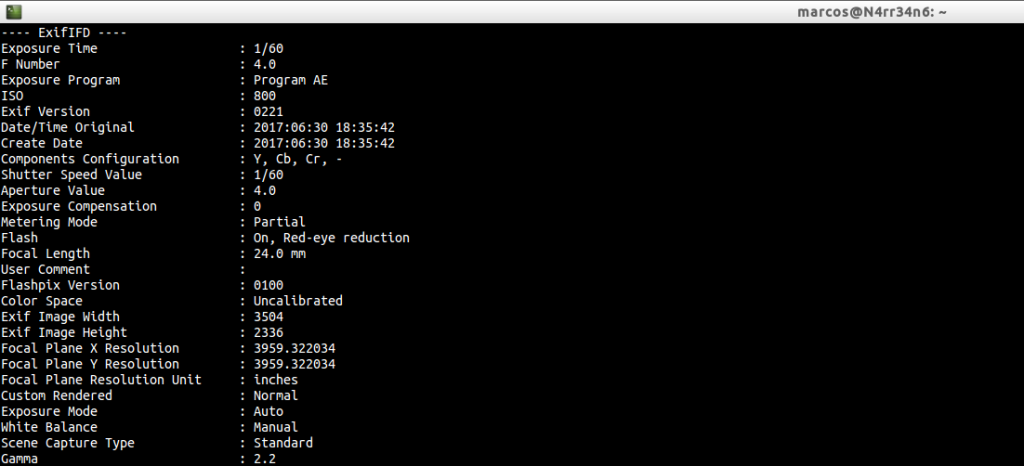
We continue, and we can see the shutter speed, the aperture, the type of program used (AE in this case). We can also see the Exif version and the original dates of image creation, (Do they match the modification dates we’ve seen previously?)

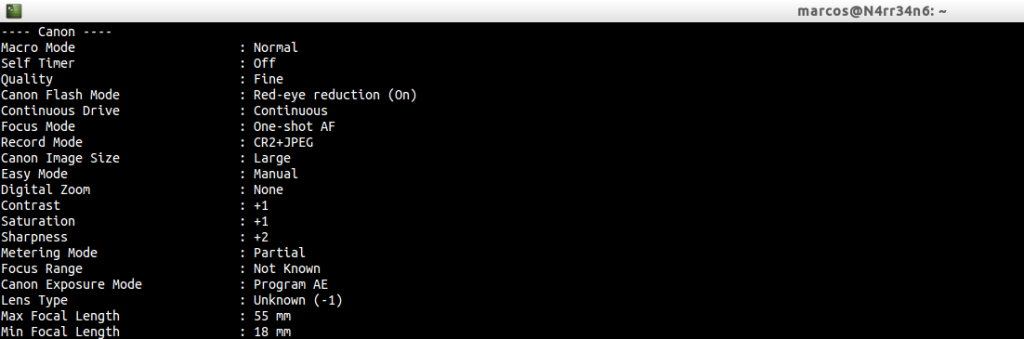
We can also see the focal length used and some more configuration data of the camera at that time. We can see the recording mode of the image in the camera. In this case both the digital negative, CR2, and the JPEG file have been recorded, (Manias that I have).

Hopefully, we can recognize the lens used. And if not, we can see the focal length of the lens.

So far, we have some data, perhaps you think that without importance. I consider all the data to be important. However, if we continue reading the screen, we find the brand and model, the Firmware it uses, with the name that has been registered as its owner and with its serial number. Is this more important? 😉

We can also get the number of camera focus points and their resolution, in pixels.

Certainly, much information can be extracted from an image in good conditions. It may be interesting to be able to group it by information type groups…
Well, we can do this by
To print all metadata information for an image, including duplicate and unknown labels, sorted by group:
Information about the system.
Information related to the file, with its format type and its resolution.

IFD0 label information.
ExifIFD Label Information.
Label information with camera settings.
In which the brand, model, user listed as the owner of the camera, serial number and resolution used is included.

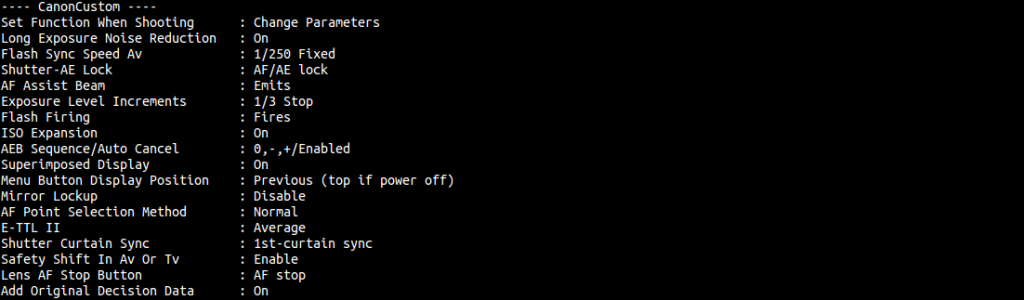
Information about personalization of the camera.
IntrepID label information.
![]()
IFD1 label information, related to the thumbnail view.

Information with the composition of the photograph.
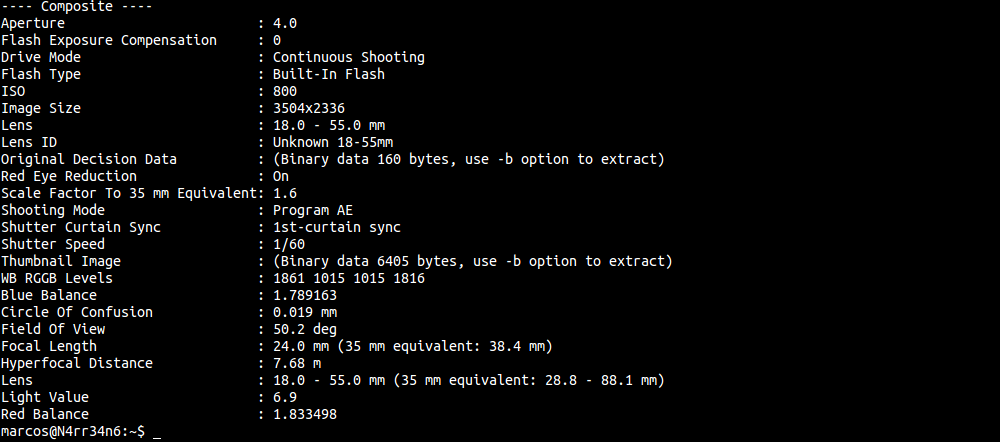
As you can see, there is a lot of information that can be obtained from a photograph, (original). And, for conducting a forensic analysis, all of it can be very useful and very interesting.
However, we may not be interested in extracting all this information. We may only be interested in extracting the ‘common’ information, of a photograph or a directory, through
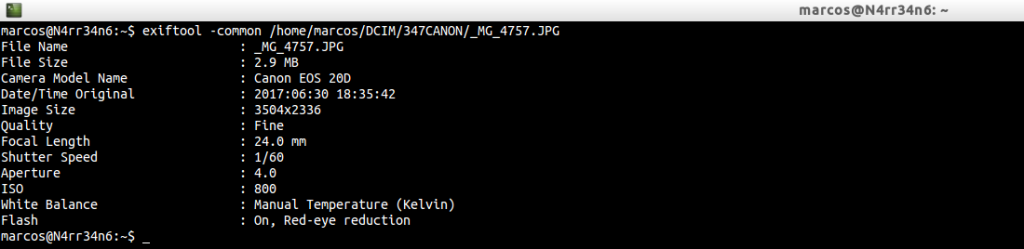
In this way, we get the name of the image, the size, the model of the camera, the original date of the photograph, the resolution, its quality, focal length, speed and aperture, ISO used. If the flash has been used and under what conditions …
Perhaps all this information is not very interesting to us. Perhaps we are interested only in some parameters, such as the creation date, the aperture, the shutter speed and the ISO used. All this, through
exiftool -T -createdate -aperture -shutterspeed -iso /home/marcos/DCIM/347CANON/*

In this way, we obtain those results from the directory that we have indicated.
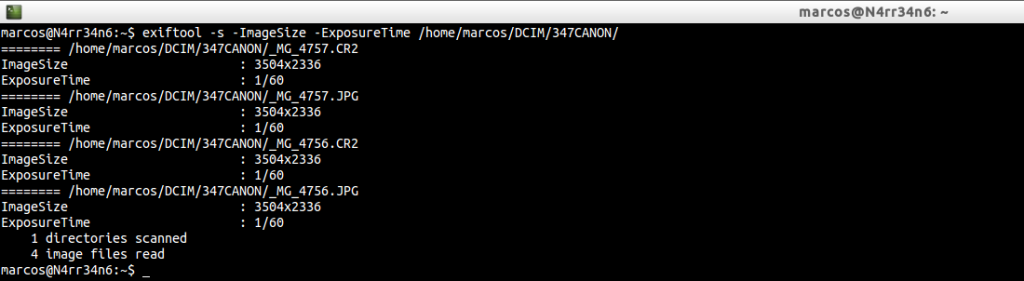
Maybe we are only interested in extracting from a directory the resolution of the photographs and their exposure time, (speed), through
exiftool -s ImageSize -ExposureTime /home/marcos/DCIM/347CANON/*
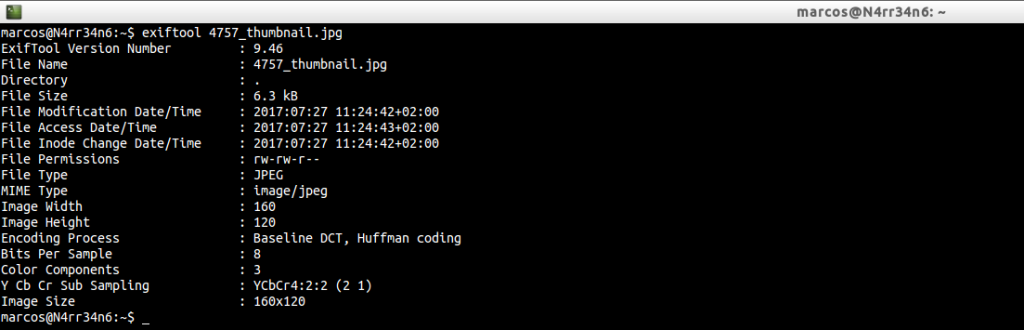
I am among those who think that appearances are deceiving. So, why are not we going to extract the thumbnail view of the photo? It may not match the original. This, we do through
exiftool -b -ThumbnailImage /home/marcos/DCIM/347CANON/_MG_4757.JPG > 4757_thumbnail.jpg

In this way we have extracted the miniature view of the photograph, which we can check by means of
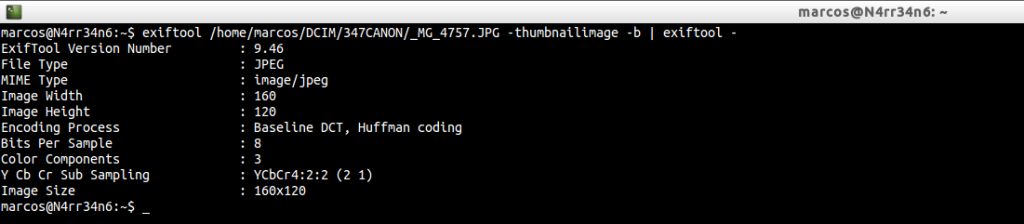
Perhaps we are more interested to be able to see the properties of the view in miniature without having to extract it, using:
exiftool /home/marcos/DCIM/347CANON/_MG_4757.JPG -thumbnailimage -b | exiftool –
As you can see, the options for performing a forensic analysis of an image are very broad. Exiftool has many options.
We might be interested in inserting a keyword within the image, using
![]()
And we could see those keywords using ‘grep‘, using

Or we might be interested in adding, hiding, a comment in the thumbnail view of the photo, using

That we could visualize through
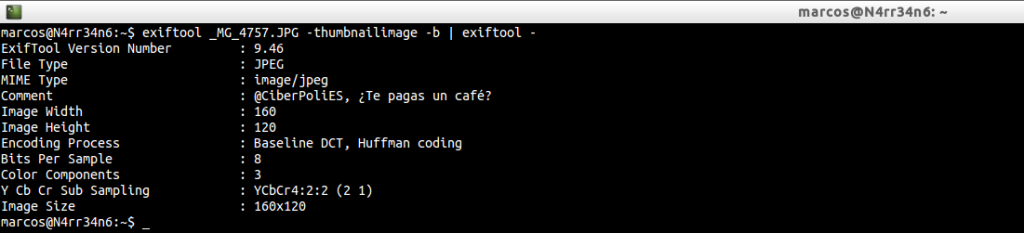
And we can see that if not studied, specifically, the thumbnail, the comment will be hidden, by
exiftool /home/marcos/DCIM/347CANON/_MG_4757.JPG | grep -i Comment
exiftool _MG_4757.JPG | grep -i Comment
exiftool _MG_4757.JPG -thumbnailimage -b | exiftool – | grep -i Comment

No. There is no subliminal message in the comment 🙂
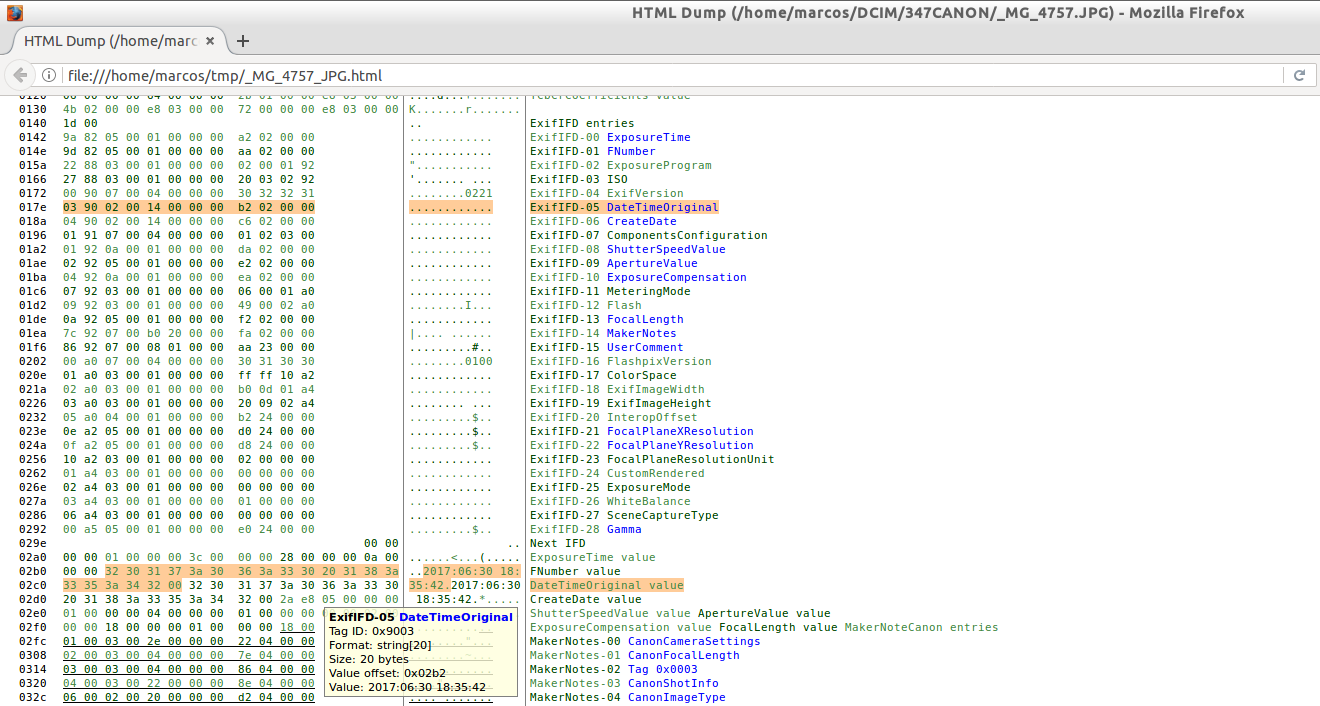
There is an option that I like to use a lot with this tool. It is an option that allows to perform a hexadecimal dump of all Exif information of an image or directory. Honestly, I think it’s the most interesting part of this tool. This is done through

If we pass it on a directory …

This report, which has been generated in HTML format, will let us interact in a certain way, as we move the mouse cursor about the information. And believe me. I find it very interesting.
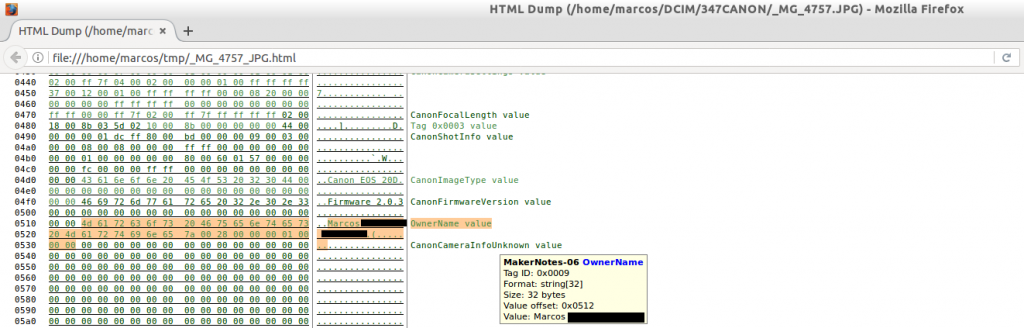
We can move through the different fields, where we can see all kinds of information that, moreover, is highlighted. Like the name of the person to whom the machine is registered.
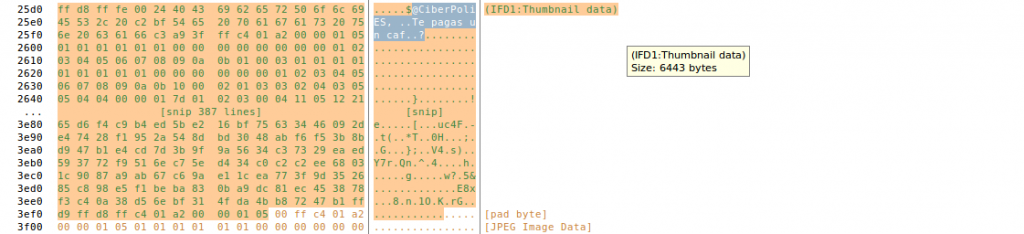
Or the comment that is hidden in the thumbnail view of the original photograph. I think this is very interesting because we could save a lot of data extraction steps.
We can print, with a formatted date, a whole directory of photographs, by means of
exiftool -d ‘%r %a, %B %e, %Y’ -DateTimeOriginal -S -s -ext jpg /home/marcos/DCIM/347CANON

We can tell you to show us the name of the file with the creation date of the photograph, with
exiftool -p ‘$filename has date $dateTimeOriginal’ -q -f /home/marcos/DCIM/347CANON

My old Canon EOS 20D does not have geolocation. But any smartphone today does. So, we can also extract, for example, the name of the file and its coordinates, which we can locate in Google Maps, through
exiftool -filename -gpslatitude -gpslongitude -T /home/marcos/IMG_20170727.jpg

I can not always enjoy the exquisite coffee I prepare in my house. For example, at work, I often sacrifice coffee time for other purposes. I take the time to do productive things. So I go to the coffee machine and pulled out a… Lemon tea, which I drink while I’m doing my thing.
Come on, we all know the purging effect of machine coffees
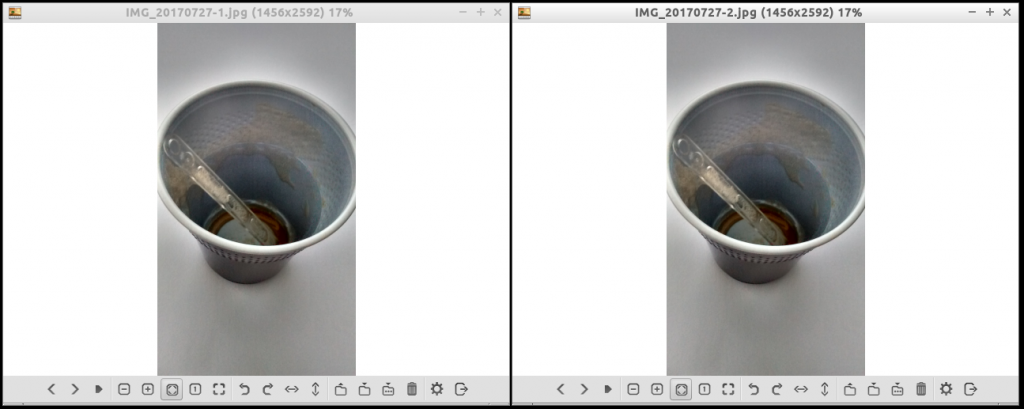
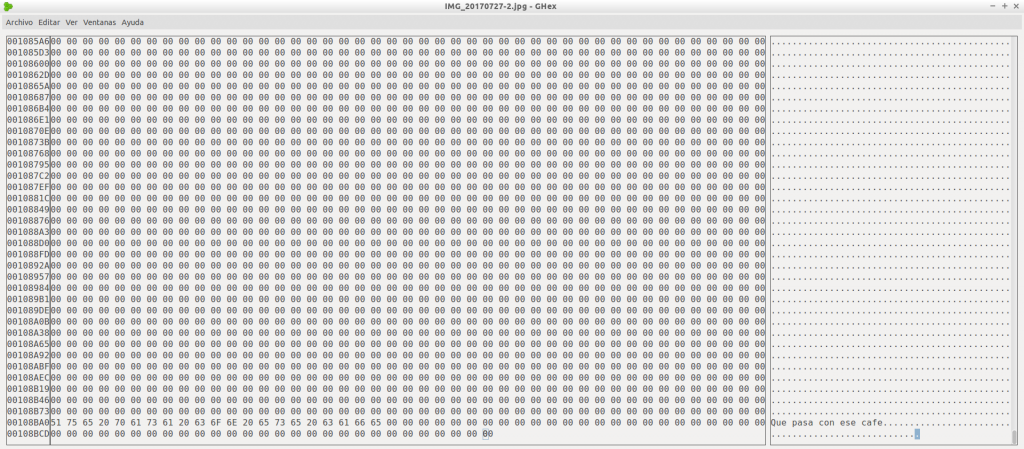
I have these two pictures. They are the same, but I duplicated them to show you the next test.
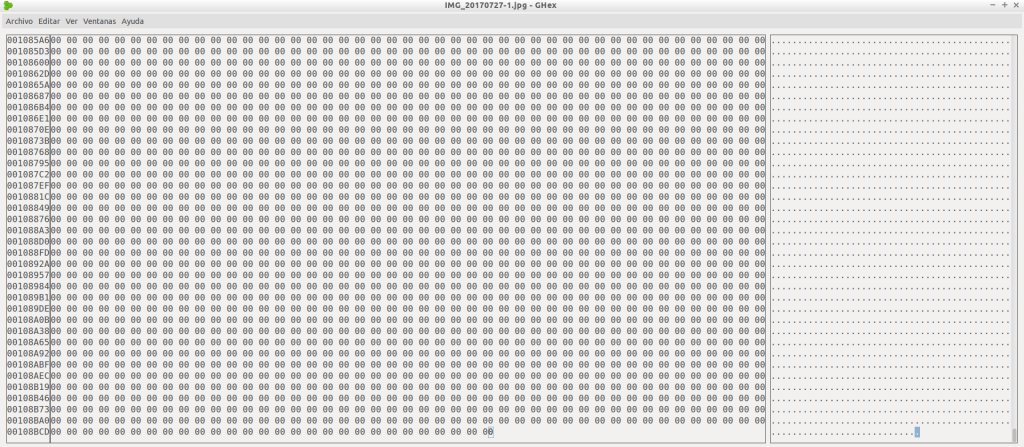
We have the first picture, wich we opened with GHex, a hex editor, and headed to the end of the content. We can see that it is blank, lacking any kind of information.
We have the second picture, which I open with the same software. We go to the end of the content, edit it and save it.
We generate the reports of these two image files, in HTML format, through

Very good. We have the two generated reports, in HTML format.
We go with the first one, in which we see nothing.
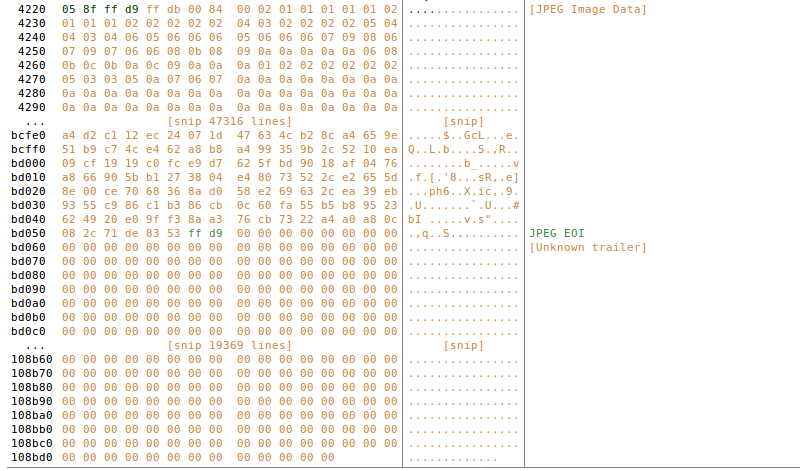
We go to the second report, where we can appreciate that hidden text.

Right now surely you are thinking:
«All of that is visible via a simple ‘strings‘.»
Yes. You’re right. But it is not the same to read a lot of lines, without any structure, that a report with which we can interact, to some extent.
I finished the coffee …
We have seen the large amount of information that can be extracted with Exiftool from a photograph, and we have seen some of its editing possibilities to do a little steganography.
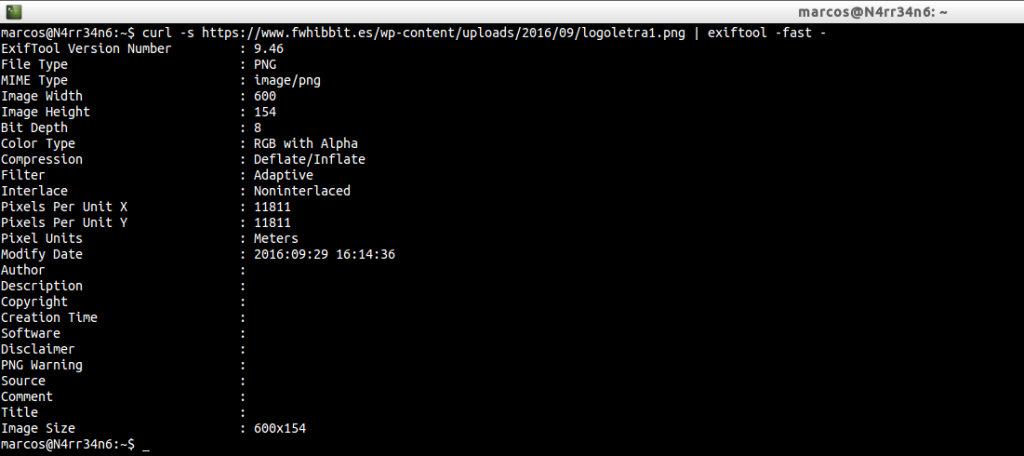
Exiftool also allows us to execute it on files hosted in websites, making use of ‘curl‘, using:
curl -s https://www.fwhibbit.es/wp-content/uploads/2016/09/logoletra1.png | exiftool -fast –
Let’s see how it behaves with other types of files. Now, with a document in PDF format, using:
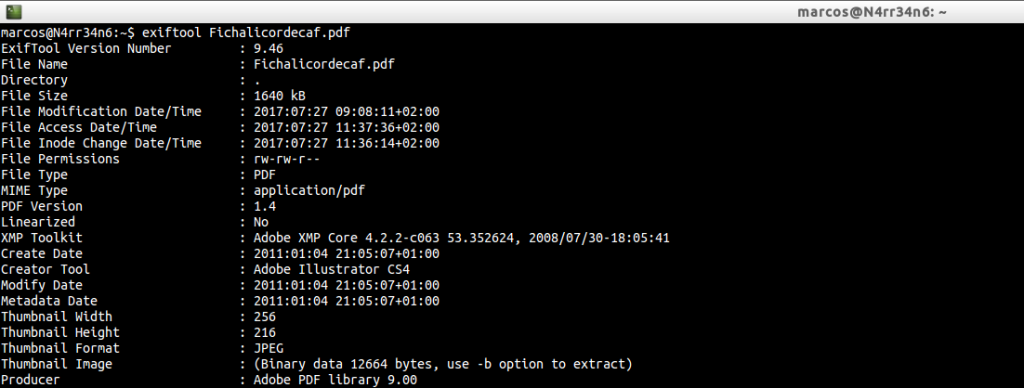
We can see, among other data, the date of creation of the document, the software used to create it and the information of its miniature view, …

We can see the actions that have been taken in the document, when they have been made and its number of pages, …
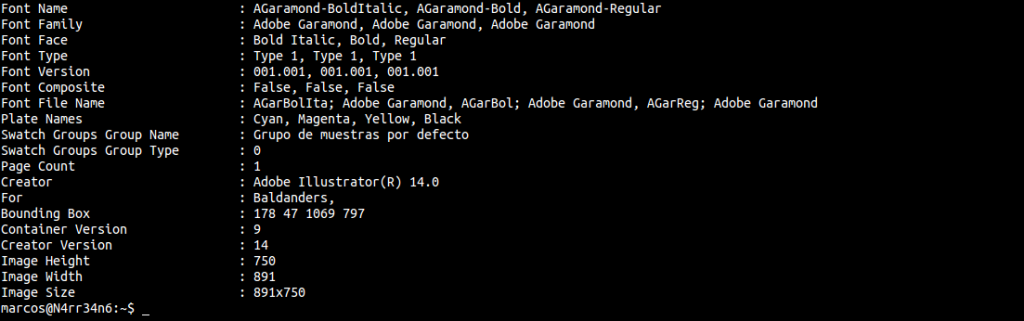
And, among other data, we can see that it contains an embedded image, and even the fonts it has used, …
As we have seen that it contains an embedded image, we will extract it, (perhaps contain hidden images), through
exiftool -a -b -ee -embeddedimage -W Image_%.3g3.%s Fichalicordecaf.pdf

Once the image is extracted from the document, we can re-use Exiftool, with
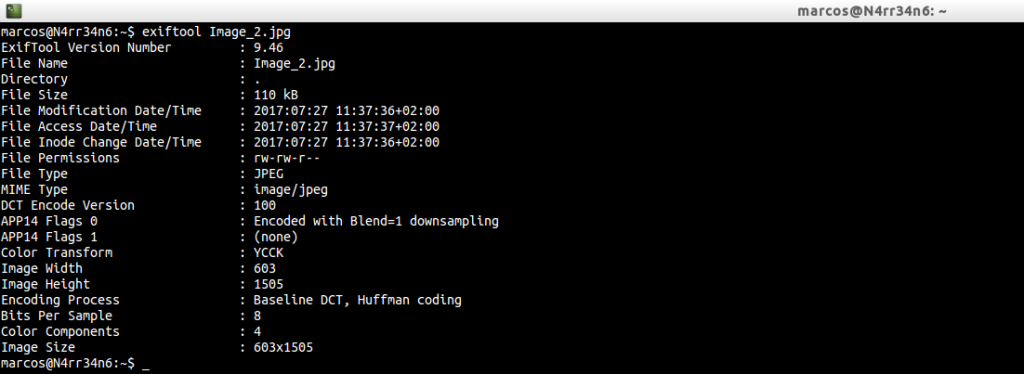
Where we can see some details of it.
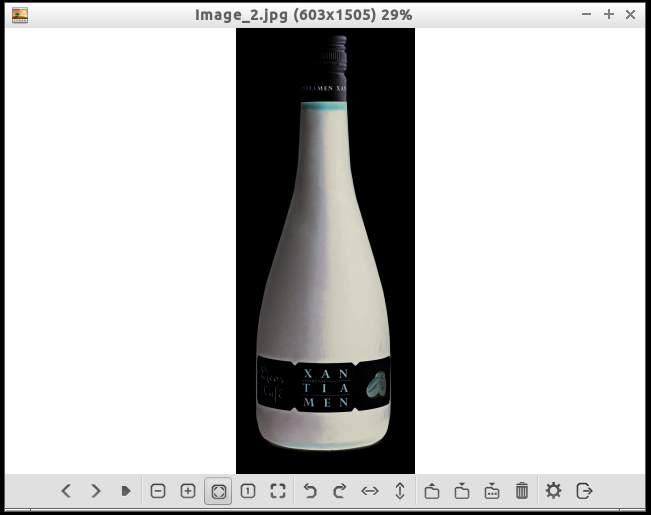
And of course, we open the image.
It will not always be so easy. Things as they are. We have another document in PDF format, which we identified through

We pass exiftool, in its basic usage, by

And we get, among other data, the size, the format of the file, the date of creation, the software that has been used, the format of the page, a history of actions carried out in the document, (very long, I have to say), …
We continue reading and we can see …

The total changes that the document has undergone, the document title, the creator, (if you have one), the affair of the document, the keywords and/or comments, … We even see a legal deposit.
We continue reading …
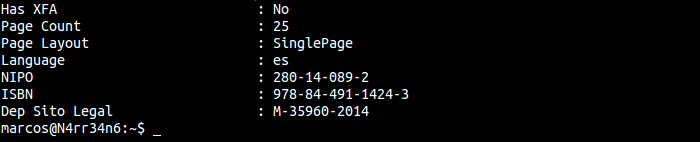
And we can see a page counter, the language, …
This document, will it have embedded images? We can check it, as before, through
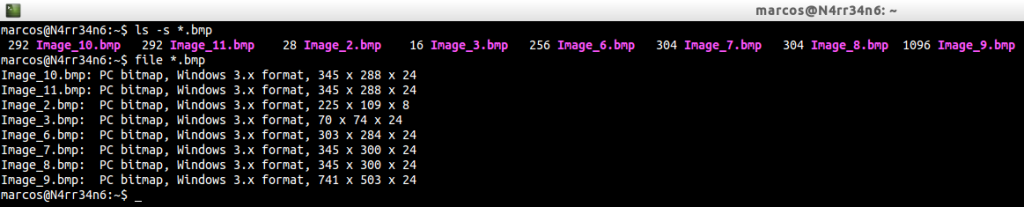
exiftool -a -b -ee -embeddedimage -W Image_%.3g3.%s H108850_tcm7-368262.pdf

He tells us that he has extracted a total of eight files. We proceed to list them and identify them, through
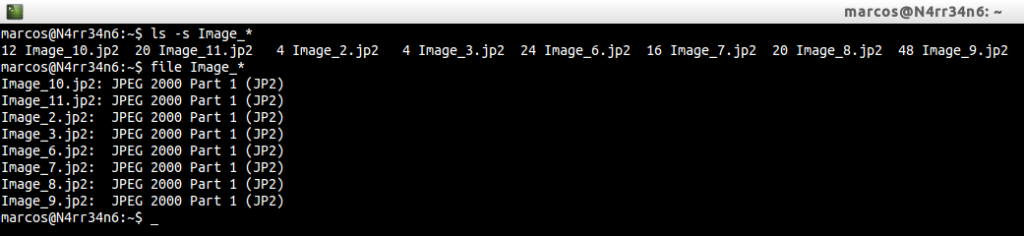
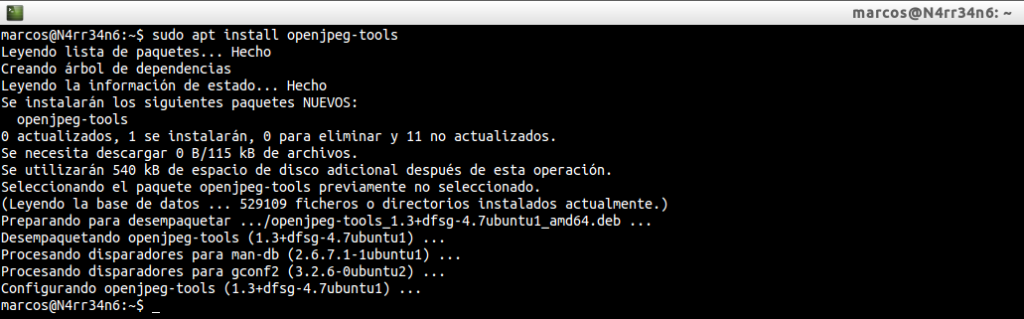
Well, well, well … We have some image files, in JP2 format? If we try to visualize them without the right tools, our system will tell us that it does not want to teach us those images. So let’s convert them, using ‘j2k_to_image‘, which is installed via
Once installed, we invoke your help, by
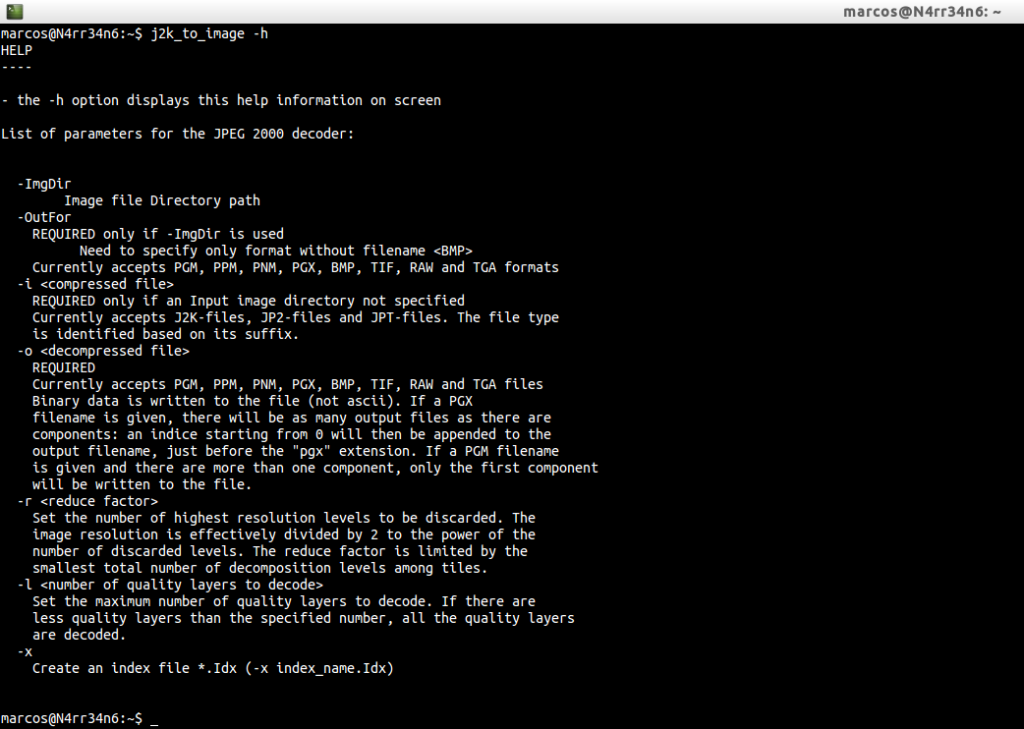
And, since the only thing that this tool requires is an input file and an output file, we proceed to the conversion of those files, through
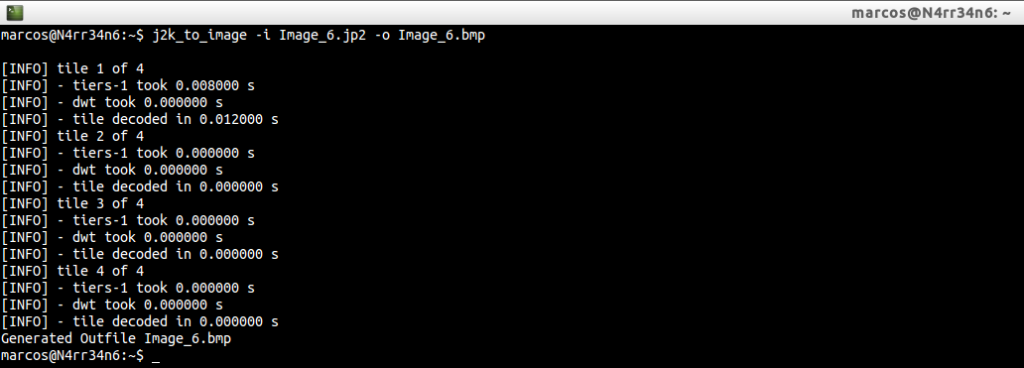
It tells us that the files have been generated correctly. So we list and identify them, using
We verify that they have indeed been converted correctly. So we just have to open the images …

Exiftool, despite what they say, I consider it an indispensable forensic tool. Yes. You can also exercise as an anti-Forensic. But you have to admit that you have a multitude of incredible options.
In this small article, I have only used a few examples of your manual. Try it. Look your playing ability. Imagination to power.
As he usually says a lot, @_Ciudadano72 …
If you read it, but you don’t do it, you do not know it
And this means, it is not the same to read a manual of ‘something’, and seeing it with some examples 😉
And to finish explaining some functions of this magnificent Forensic / Antiforense tool, its official site has a page available where we can see how to execute it, according to the examples that we want to use.
This much talking about coffee, it has made me thirsty. I think I’ll take another one 😉
That is all, for now. See you at the next entry. This Minion, delivered and loyal to you, says goodbye… for now.
Marcos @_N4rr34n6_